Jeremy Hunt
-
Posts
563 -
Joined
-
Last visited
Content Type
Profiles
Forums
Blogs
Events
Articles
Video Feed
Gallery
Everything posted by Jeremy Hunt
-
Davy Wotton Shad (Floating) Recipe: Hook: Pencil popper hooks - 2/0, 1, 2, 4 Thread: .006 monofilament Lead wire: .25 or .30 or (unweighted to stay on the surface) Inner body: Wing-n-flash / dubbed around the shank Outer body: Flexi - cord ¼ any color you desire. Pearl and pearl silver are the popular ones. Gills: Dave Whitlock SLF minnow gill Eyes: 5/16”, 1/4 “ Additional materials for tying this fly: zap-a- gap, permanent marker pens- black, red, olive green. I like the prisma color markers the best, but you can use what you got if need be. Great fly for all types of fish. The best luck I've had with this fly was fishing the ten thousand island for snook in Florida. This was some of the best snook fishing I've ever had with this pattern. So next time you go snook fishing make sure you rie a few of these. TYING INSTRUCTIONS: Step 1. Start the mono somewhere in the middle. You will have to wind back over with a few turns to lock it in. This mono is hard to secure around the metal shank so make sure it's secure when you go to wind to the bend. This fly is not going to have any weight in it. However you can add weight or fly rattles to create any action you want. Step 2. Cut a piece of artic fox and tie it in. You will need to comb out the excess hair that is to short to tie in. Your looking for the longer hairs. Also pick out some of the longer hairs that aren't the same length as the majority of the tail. One thing I will mention to you is don’t measure the tail the length of the hook shank. You want it to be short. Measure it half the length of the hook shank. Most shad’s if you look at them they have a shorter tail than the body. Just a little tip, you don't have to pull all the flash out of the bag. Just pull the tips of it and you should get the desired length you want to tie in. When you go to cut it to length, cut a little past the tail. This will make the flash stand out a little bit more when it's in the water. Note: Make sure you only tie in enough flash to blend in with the tail. Step 3. Now dub some of the wing-n-flash on the mono and wrap it over the lead wire. Make sure you cover all the lead and only wrap the flash sparse. If you dub the body too fat, you will not be able to slide the flexi cord over it. If you have any of those loose flash strands hanging all over the place after you are done dubbing it go ahead and cut those off. You want the dubbing to be as close to the hook shank as possible. Step 4. You don’t need too much of the minnow gill dubbing. Just enough to wrap over the hump and that’s it. Just pay attention to where I'm at with the dubbing on the hook shank. I always use the hump for my reference on any of these I tie. Now tie off the thread and you’re ready to slide the flexi-cord on. When you tie it off go ahead and put some zap-a-gap on you’re knot so that the fly really holds together. Step 5. When you go to measure the flexi-cord make sure you go a little past the eye of the hook so that you can form a slope in the belly. Measure from where you tied in you’re tail to the whole length of the shank and a little past the eye. Note: Remember to burn the ends with a lighter. It will give it a edge so when you go to start the thread to lock it in the thread it won't slip down when tying it in. Step 6. This part can be a little tricky. One way that I have fixed this problem is by putting some zap-a-gap on the top part of the flexi cord so that my thread grabs it and doesn’t slide down when I go to cinch it around the shank. You will notice when you do this step the mono will want to slide down to the tail. Make sure that the flexi-cord is not side ways (the fold) when you go to cinch it in. Step 7. Wapsi has made this part a little easier for all of us. They recently came out with different sizes of foam called “Foam Cylinders”. These patterns are usually tied with size 1/4 for the larger sizes and 1/8 for the smaller sizes. We are using the 1/4 size. These are round in size so we will need to cut this in half. I have found out that using a long straight pair of scissors will do the trick. I started off using razor blades but found out in a hurry that this wasn’t working. My foam always seemed crooked. The only thing you need to pay attention to when you go to cut this is don’t try to make to many cuts going up the foam. I try to make one solid cut so that I don’t see my cuts on the edges of the foam. So after you have made you’re cut tie one half of this in the back on top of the flexi cord. Tie you’re thread off and put some kind of glue on you’re wraps so it will hold together. Step 8. This is another tricky part to do. You will notice that you will have to do the same thing here as you did in the back with the flexi cord. You will see that the flexi cord is hanging over the eye. What you will need to do is push the cord back to form you’re belly and while you are holding the flexi-cord back just behind the eye you will need to grab you’re thread and tie it around the cord while holding the cord back so it doesn’t slide back over the eye. What I do is put the tag end of the monofilament in my mouth and count that as my third hand. By having tension on the tag end with my mouth, this will allow you to be able to wind it around the cord while still holding the cord with you’re other hand. Step 9. Once you have tied in you’re flexi-cord in fold the foam over and tie it in also. Whip finish the fly and now you're ready to glue the eyes on. You will see a lip hanging off the front and the back of the foam. I like to cut those even (on top) to keep the fly looking tapered with the foam. Step 10. Finish Product. I would give this a good day to dry before fishing it. Additional comments: - A fly rattle may be use in the middle of the shank on the under side by using epoxy. -Also you can create how you want this fly to ride in the water by how much foam you are using. -You can paint the cord with permanent markers to create different baitfish patterns.
-
Soft Hackle Recipe: Hook: 3761 TMC size 16-22 Thread: UTC 70 color to match body Body: Thread Thorax: Sow-scud dubbing Collar: Hungarian Partridge Rib: UTC wire (BR) TYING INSTRUCTIONS: Step 1. Secure the thread on the hook shank. Tie in at the front. Only do enough turns to get the thread started. Step 2. Get a piece of wire and tie it in at the front to. You want the wire down the whole shank. One to keep the body the same shape and two, to also secure the wire in solid. You want to hold the wire at an angle as you wind back, because of the way you’re holding the wire and winding back it will slide down the wraps butting each wrap side by side. This is real important if you only have a thread base for the body of the fly. By using a floss thread you will definitely like the way the body looks verses uni-thread or threads that are waxed. Step 3. Advance the thread forward still making each wrap next to the next wrap. This will build the thread wraps making the body smooth. Wind the wire forward what I like to do on the first turn. Try not to pull hard on the first turn because this will shift the wire down at an angle which will shift the wire and the body will have an uneven look. Once you do the first turn around then you can apply more tension with the wire for the rest of the turns. Even when I space them to create the segments on the body. Once you tie the wire in then heat the wire by moving it back and forth and it will break and will not leave a tag of wire. If you do use scissors don't use a good pair. This will dull them qiuck. Also cut at the back of the scissors. Step 4. This step is kind of tricky. You don't want to use a lot of dubbing. Just one or two wraps. When dubbing this on the thread. Try not to twist to hard because you don't want it to grab the thread when tying it in. You want it to have a shaggy look. Step 5. What you want to do is grab the tip of the feather with one hand and with the other hand pull back split the barbs evenly on each side. One thing before you go on is you only want the barbs for the collar and not the shaft stuff on the very bottom of the stem. Pull it off the stem. With the tip section of the feather you are going to tie in the middle where you split it. Now if you tied the feather in right the tip side should be facing in front of the eye. Step 6. This part will definitely give you practice on your hand coordination. You cannot give this too much tension or you will break the feather or pull it out when you go to wind it around. Step 7. Make you’re first slow with not a lot of tension when you go around on the first turn. Try not to twist the step around when you go around. You want the hackle laying in the back direction. To make the collar look palmered, you need to work on this part and get used to working with small feathers. You’ll get it in time. Once you tied all the hackle in. Tie the stem in and cut it off. Step 8. Whip finish the fly and gloss coat the head.
-
I'm curious to see it. Can you post a pic?
-
Stimulator Recipe: Hook: TMC 200R / or 2303 Sz 4-10 Thread: UTC 70 Fl. Orange Tail: light elk hair Body: Yellow (dubbing) Lower Body: Furnace Brown Hackle Wing: Light elk hair w/ Krystal Flash Thorax: Orange (dubbing) Upper Body: Grizzly Hackle TYING INSTRUCTIONS: Step 1. Start the thread and wind to the bend. Step 2. Tie in about half a pencil length of elk hair. Make sure you stack it in a hair stacker before tying it in. Cut the butt ends and tie it in real close. Not to much excess. Keep the shank clear for the next steps. Step 3. Once you have tied down the elk hair you are ready to tie in the grizzly hackle. You are going to tie the feather in at the tip and make sure the dull side is facing down (concave). Step 4. Now you’re going to dub the fly up just past the middle of the shank. Always pay attention to proportions. That is what I see wrong with most patterns that are newly tied. Always look at pictures when learning new flies. It will definitely help you in the long run. Step 5. Wrap the feather up to where the dubbing stops. Depending on how you want your fly to sit in the water will determine how many wraps you tie up. I like to wrap about five to six turns. Step 6. Tie in about eight strands of krystal flash. Measure the flash to the end of the elk hair you have in for the tail . Now you're ready to tie in the next section of elk hair. Step 7. Measure the next clump to the same size as the krystal flash. Step 8. Tie in the next grizzly hackle, but this time you are going to tie in the feather with the fat side instead of the tip side. You want the hackle to tapered to be smaller at the eye. Step 9. Now dub the fly up to the eye. You want the dubbing to be dubbed going from big to small. You don't need a bunch so try to grab a small amount of dubbing when putting on the thread. If you are having trouble keeping the dubbing on the thread you are probably dubbing to big of a clump in one area. Try to space it out when you are dubbing it on. Also only go one direction when dubbing on the thread. Step 10. Wrap the hackle about three to four turns and whip finish the fly and that’s it. Just make sure you still have enough dubbing showing through the wraps.
-
Wooly Bugger Recipe: Hook: 5263 TMC size 2-10 Thread: Uni-thread 6/0 color to match body Tail: Marabou that matches body. Add crystal flash if needed. Rib: Gold, sliver, or copper wire Body: Chenille (olive) Hackle: Brown saddle hackle Weight: .20 lead wire TYING INSTRUCTIONS: Step 1. Go ahead and wrap your lead on. I like to weight most of the shank when tying mine, but you can do whatever you desire. You will need to leave enough room in the back to tie in a tail with some tied down on the hook shank. You don’t want to tie in your marabou tail on top of the lead wire. I leave some room at the eye so I don’t have any crowding when I finish the fly off. A good way to get this right is count the amount of wraps you do and center it. For those who don’t know what size wire to use for what size hook here is the rule of thumb. Whatever size diameter the hook shank is that’s how big the lead should be. For most streamer hooks in a size 4-8 typically you will use .20 and .25 lead wire. Step 2. Start your thread in the front and wind on top of the lead at an angle to the back locking the lead into place. Wrapping at an angle will keep the thread on top of the lead instead of going inbetween them. We call this a thread dam, when you build thread wraps on each side of the lead in one area keeping the lead from sliding. Cut the tag end off and your ready to tie in your tail. Step 3. Measure the tail the length of the shank. Go ahead and cut it before you tie it in. Butt the tips up to the lead in the back and tie it in. Make sure you wind all the way to the bend. If you notice the lead and the marabou are the same size in diameter keeping the base even and smooth. That's really important because I see alot of tyers build a high part where they tied everything in one area and create an uneven look. Note: Always prep the chenille and peel off some of it to the core. You only want the core to be tied on the shank. I'm using a microbarb hackle, but the key is to split the hackle evenly and tie inbetween them. Step 4. This step I'm not using wire but if you do this is how to do the step. Tie the wire in, but make sure you tie it the whole length of the hook shank. This will lock it in and keep it from slipping when you go to wind it forward. Sometimes if you only tie in the back with the wire it will slip out from to much tension from starting to wind it foward. Really look how I tied in the hackle. You want to tie it where everything meets up to the marabou tail in the back. Now with the front section of the feather you are going to pull back and split the barbs evenly on each side. You want to be as close up to the tip as you can if your using regular hackle. You only need enough of the tip section to be tied in at the front on top of the lead wire. Tie the tip section in about three to four turns of thread and make sure you tie it with the concave (shiny side facing down). Now what I want you to do is slide the feather back so that the barbs you split are even with the marabou tail ( where the thread wraps start). Step 5. Wrap the chenille up to the eye. Make sure you always leave enough room to tie the fly off. Step 6. Palmer the hackle up making each space the same all the way up the fly. You can do as many turns as you want. I don’t like to do too many though. If you start to see your hackle barbs going every direction instead of the nice laid back look. I can probably tell you what caused it. You twisted the stem of the feather around while winding it up. When you wind the feather up make sure that you don’t twist it. Step 7. Whip finish and glue it. I like to use gloss coat. Keynotes: Using flash for the body is a great night fly pattern that really produces a lot of strikes. I like pearl and shades of olive greens for the body. I wanted to touch on marabous as well. There are all types of marabou but the one I have found to work the best and make a really good looking tail for wooly buggers is the “Wooly Bugger Marabou”. It really cuts out the guessing game on how much and how long. That's already been done for you from the factory. Just grab a piece and you’re good to go.
-
Crackleback Recipe: Hook: Dai-riki 300, Daiichi 1170, Mustad 94840, TMC 100 -- Size 12-16 Thread: UTC 70 Shellback: 4 strands of peacock herl, pulled full length over top of body. Body: same as thread Hackle: Metz brown/furnace to match hook size TYING INSTRUCTIONS: STEP 1. Start the thread at the front of the hook. Once you have it locked in go ahead and tie in four strands of peacock herl. Note: Always remember that if your tying a fly that is showing a thread body make sure you keep an even and smooth thread base. Step 2. Tie the peacock herl all the way to the bend. There is a lot of bad herl on the market so make sure you find some that has a lot of the greenish herl on the stem. Step 3. This is how the hackle should look after you prep it. Step 4. Repeat the same step you did when tying in the herl. Make sure you don't tie any of the hackle in that is at the start of the stem when you go to wind it forward. The hackle should flare the first turn. You will notice if you did the step wrong because the hackle will look like you tied it down on the shank. Step 5. Your thread should be at the front when you tie the floss in. This will also be tied the whole length of the hook shank. If you notice by repeating the same step with all three materials up at the eye you have built a nice foundation of thread along the shank. I'm using a white in 1x. Wrap the thread back up to the eye. Step 6. Wrap the floss side by side all the way up to the eye. I like to overlap the wraps a little. Step 7. What I do before I pull the strands of peacock herl over the top of the body is run my fingers up and down the herl to create a rougher look. You can also twist the herl to make it more durable. Fold it over and trim the excess off. Remember not to crowd the eye. Step 8. Grab the tip of the stem with the hackle pliers. When you grab the hackle with the hackle pliers make sure it's not at an angle (aligned with the hackle). This will prevent any twist in the hackle while winding it forward. The hackle cannot twist are you will have hackle in every direction and that's what you don't want. The more wraps you do the higher the fly will sit on the water. Whip finish the fly and treat the hackle with water shed. I would let it dry over night and this fly is ready to fish. Keynotes: Make sure your holding the hackle up when you cut it. If you get hackles going forward or crowding the eyes it is probably created by the way you cut and tied off your material. What ever you do don't cut the hackle stem on the underside of the eye.
-
Stalcup's Ultra Damsel Recipe: Hook: Tiemco 3769 Size 10,12 Thread: Clear Monofilament .006 Shellback: Hareline Co. / Medallion Sheeting Body: Synthetic Tubing Material (pre-made) Epoxy: Z-poxy (5 min. epoxy) Eyes: Hareline Co. / Damsel eyes Legs: Hareline Co. / Terrestrial legs (Note: You or your local fly shop can purchase all these material from Hareline Co.) Tying Instructions: Step 1. Start your mono thread and wrap back just past the point of the hook. Step 2. Now you’re ready to tie in your damsel body. You want this to be twice the length of your hook. Only tie this in half way up the hook shank. So tie it in the middle and wind back. Cut the excess off. Step 3. Cut your medallion sheeting about four times the length of your hook and make sure it’s not too wide. I would say a ¼ inch wide. You want to tie this in the middle of the strip you cut. Once you tie it in the middle make a few wraps then fold the other part over going back the same direction. Later one will be cut. Lay one end over the body. The only thing to really pay attention to when doing this step is to make sure it’s not shifting on one side of the shank. It needs to lay in the center right on the top. Step 4. Tie one leg in using a figure eight motion doing this twice. Move up a couple turns and tie the second leg in the same as the first. Repeat the third set of legs. Make sure you leave enough room for the eyes and to whip finish the fly off. Step 5. Now tie in your eyes. Make sure you leave enough room between the eyes and the eye of the hook to tie down your wing case. Tie these in the same way as the legs in a figure eight motion. It really doesn’t matter if they’re real tight. Just make they don’t move when you go to apply the epoxy. Step 6. You should have to pieces of sheeting in the back. Fold the first one over right behind the eyes. You don’t have to make more than a couple of turns. Wind the thread just in front of the eyes and fold the sheeting over the eyes where you made the figure eight wraps. This will hide the wraps and clean up the fly a little bit from all the mono. The good thing about this fly is it will look transparent once you apply the epoxy. Note: If you don’t have colored medallion sheeting you can color it. I’ve found that prismacolor markers work the best for me. It will take the cloudy look away and somehow make it clear with a little color from the marker. When coloring it only make once stroke. Don’t go over the same spot you already colored. This will create a little build up if you do. If that happens wipe it off. Don’t worry about the color you applied. It grabs the sheeting and won’t whip off, just the excess. Step 7. Whip finish the fly. When you go to cut the sheeting off at the eye, make sure you don’t have any tag end hanging off. Step 8. You should still have a piece of medallion sheeting still hanging in the back. You will make a cut about half an inch up the sheeting. Make sure you cut it to look like it has an upside down “V” shape. Step 9. Now you’re ready to apply your epoxy, but before doing this you will need to adjust the legs. Pull the front legs forward, the back legs towards the back, and straighten the middle legs out to the sides. You can also adjust your legs while your epoxy is drying to make sure they stay in their correct placing. Now for the epoxy, you want to use about two drops making sure you get in between the legs and a little on the bottom. Use another drop and epoxy the head. Note: When you mix epoxy you always want to mix a little more hardener than the resin. This will definitely make it harden right with no sticky residue. That’s what happens when mixing too much resin with your hardener, your fly will never dry it will always be sticky.
-
Zebra Midge Recipe: Hook: 2457 TMC, 2499sp TMC, 2488H TMC Thread: UTC 70 color to match body. Body: Thread Rib: UTC Wire (copper, silver, gold) in the brassie size. Head: Tungsten 3/32 for 14, 5/64 for 16 Tying Instructions: Step 1. Slide the bead on. Depending on the hook size will determine the size bead you will use. The two sizes I tie on more than any other sizes is 14 and 16 with 5/64 and 3/32 beads. So I really don’t waste my time with size 14 unless I am fishing high water. Step 2. Start the thread just behind the bead and do enough turns just to lock the thread into place. Cut your tag end off. Try to build a cone shape behind the bead with thread wraps. Step 3. Cut a piece of wire and tie it in behind the bead. I like to push it up in the bead. Advance your thread back to the bend. Make sure your wraps are even and you have a nice smooth thread body when you wind to the bend. Step 4. Once you get to the bend you are ready to advance the thread back up just behind the bead. Step 5. Wrap the wire forward making segmentations as you wind the wire up. Try to make the spaces the same. The main key to this fly is make sure the fish can see these segmentations. Step 6. Tie down the wire and move it real fast back and forth. It will break from it getting hot. If you cut it with scissors more than likely you will have a little tag showing. By doing it this way you want. And you will never mess your scissors up from cutting wire. Step 7. Glue your thread wraps behind the bead and you got yourself a zebra midge. Keynotes: You will see that this pattern calls for UTC 70. This is a newer thread that Wapsi came out with. This is more of a floss thread that will lay flatter on the shank. This will make a smoother base for any pattern that calls for a thread body fly. Also you can tie in dubbing or some sort of peacock herl for the collar of the fly. If you are tying this fly with black thread try using a nickel bead with silver wire. It is one of the best midges for our rivers around here. Good luck!
-
Chernobyl Ant Recipe: Hook: 2xl dry fly hook Sz 4-8 Thread: UTC 140 / color to match body Underbody: Krystal chenille or just a thread body. Thread needs to match the foam that will be the first underbody. Overbody: Two pieces cut to length /2mm foam Legs: Round rubber legs Indicator: red 2mm foam cut to length TYING INSTRUCTION: Step 1. Start your thread and advance the thread to the bend. Step 2. Tie in a piece of krystal chenille. Step 3. When measuring the foam strips, you only need to measure them hanging off the hook on both sides just a little bit. Go ahead and tie your first piece on, but don’t make a lot of wraps because you will be tying a lot more materials in. Step 4. The next piece of foam should be the same cut as the first one. Tie it on top of the first one in the same spot. The key is not to see a lot of thread wraps through the foam so keep it light on the the thread wraps. I do about three turns and then I'm ready for the next step. Step 5. The next step is to tie the little piece called the “indicator”. It's to be able to see from a distance. Step 6. Once you have tied all the foam on, pull back and do a few turns to lock them in to prevent them from shifting. Now your ready to tie in the first set of legs. I like to fold them around the thread and then wind them in. Step 7. Tie in the second set of legs. Step 8. Wrap the chenille up to the eye. Step 9. Fold the first strip over and tie it in only making a few thread wraps. As you tie in the other material you will have enough to biuld up the thread wraps to secure the material in tight. Make sure after each time you tie in the foam the last wrap you cinch a little tighter. Step 10. Fold the next color of foam the same way you did the first. Step 11. Repeat the same step as you did to tie in the first red indicator. Step 12. Tie in the second set of legs the same way you did the first set. After you have tied in the legs you are ready to whip finish the fly.
-
Ostrich Herl Scud Recipe: Hook: 2457 TMC size 14-18 Thread: Uni-thread 6/0 color to match body Body: Ostrich herl (one strand) Head: Red thread head TYING INSTRUCTIONS: Step 1. This fly is very simple to tie but the results are amazing. All you need is three strands of ostrich herl. You can use any color you want. The common colors for these rivers are gray, olive, and tan. Start the thread in the front and cut the thread tag off. Step 2. Tie three strands of herl. Wind to the bend and avance the thread back to the eye. Step 3. Now dub a small body of dubbing up to the eye. Step 4. Wrap the herl up to the eye. Make sure your wraps are side by side. Step 5. Grab some curved scissors and cut the whole back along the shank. If you cut to close you will cut the stem and it will come apart. So pay attention to your cut. If you notice after you cut the back the stem will give off a segmentated look.
-
Prism Zonker Recipe: Hook: TMC 300, size 4-8 Thread: Uni-thread 6/0, black Body: Prism Dubbing Wing: Rabbit Bead: Tungsten Faceted Tying Instructions: Step 1. Slide the bead on and start the thread behind the bead. Trim the tag off and wind to the bend. Step 2. Get a regular (cut) strip of rabbit. People measure these all different ways, but if you don’t want short strikes keep it the length or shorter then the hook shank. Split the hair where you want the desired length and tie it on top of the hook shank. If the hair gets in the way as you’re tying it in you can wet your fingers and brush the front part back. After you tie it down with four or five wraps of thread in the same spot, lift the hide up and tie right behind it. This will lock the hide in and prevent it from shifting once you wrap it forward. Step 3. After you’ve done that you’re ready to add some dubbing to the thread and wind almost till you get to the bead. You still need to add a little bit of red for the gill so keep that in mind also. Note: One more thing you will do is fold the rabbit over the bead so make sure you leave enough room for the rabbit strip to be tied in and cut off. Step 4. Tie in the red dubbing for the gill. Notice there’s a little room between the eye and the bead. You can also push it back a little to push the dubbing back if you find yourself with no room. Step 5. Tie off the thread and add a little glue on the thread that you tied off. Retie the thread in front of the bead and fold the rabbit over. Measure the strip to butt up to the eye and tie it down. Cut the excess off and tied down the strip really good. Also tie back on it a little to make sure you lock it in real good. Showing you the cone shape look you want with the thread. Step 6. Whip finish the fly and add some glue on the thread wraps.
-
Tying Class at the Hatchery 2-26-08 I must say the first class was a good one. It feels good to get back in the groove of things. We had a few new faces which was good to see also. We tied two patterns tonight. Since we had a few new ones we started off with the easiest one first which was a standard bunny leech with a tungsten bead. Since it’s shad month of course it was all white. I did challenge everyone with adding some eyes and epoxy them in. I wish we had more time because we didn’t really tie the hard fly soon enough, but everyone finished with tying one Davy Wotton Shad which was the test tonight. If you’ve never tied this fly I must say it’s got a lot of steps and it can get the best of you if you haven’t tied a bunch of step flies. At the same time it’s good to tie with different material so you learn about it and learn thread control with what material you’re working with. To me that’s how you get better. If you only tie two or three step flies it will take you a lifetime. I also think if you identify new materials more then likely you will tie more patterns that call for those particular materials. The next class will be another class related to shad type patterns so make sure you attend. Classes are only going to get better. I also want to say I appreciate everyone who attended and it was nice meeting the new guys. Here's the patterns we will tie for March 2008 We will work on shad patterns for the shad kill. Since the lake turned over then that means the shad kill can happen any day now. These shad patterns will also work for warm water species so you don’t want to miss out. If you’re a beginner these classes are for you as well. You can either watch or join in. It’s really up to you. Davy Wotton Shad- Tied at the Hatchery Floating Shad- Tied at the Hatchery Marabou Streamer- Next Class March 4th at Lilley's Landing Resort Pencil Popper Shad- Next Class March 4th at Lilley's Landing Resort Double Bunny- Next Class March 4th at Lilley's Landing Resort If you would like to know more about classes please call me at 417-294-0759 or email me at flytiehunt@hotmail.com
-
Nice fish Leonard. Love the colors.
-
That's what I'm talking about. Put in at the MDC and row on the sides of the bank. The opposite side is alot easier to row up, but a little difficult once you get to big hole. That's where you skull over to the other side where the old chute three is. There's a little eddy with a ton of fish and along that grassy bank is key if your fishing san juan worms and midges. That best part of the whole river I think.
-
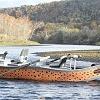
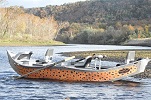
Actually yes, it tracks real well, but you can't get all the way up because the current speeds up and stays the same all the way from one side to the other. You have to find eddy's or slower current or you can forget it about it. I don't have problems until I get passed outlet three. You have to get on the other side of the bank from there and get behind the island across from outlet two. Once you row up out of that it because to tuff to row anymore so you have to drift and anchor the spots you want to fish. I hardly do that anymore because I have a supreme boat now, but in rivers like James River, Kings River, Swan Creek, Little Sac, the Current, and Meramec Springs I wouldn’t leave home without my pontoon. It sure beats a canoe any day of they week. And the fact that you can actually fish effectively while drifting in these boats make a world of difference.
-
It's called Rst. Brown on the spool and it is by Uni-thread.
-
I agree with the pontoon boats. I have two with one being a water skeeter with a standing platform and wouldn't trade it for the world. You can use a trolling motor, but it depend on the thrust. I've found that it makes them ride high in the front, but if you move your seat forward it fixes the problem just like that.
-
I get what your saying. I'll have to try that. These ones tied with snowshoe rabbit look the best out of all the mouse patterns I’ve tied. And here lately I've been tying all types of patterns with rabbit. I guess you could say that's my thing right now. We go through phases and this is mine at the moment. This mouse is tied with close cell foam for the body and I really found that mouse patterns that are submerged work better for big browns at night because they form a wake better then flies that ride higher on the water. So I guess you could say I’m experimenting with it. I also like caribou mouse as well. Deer hair mouse are my least favorite. I used to live in Michigan and lived right on the lake so I got to fly fish for bass pretty much everyday. I miss it and those bass love mouse patterns. I would throw mine on the bank and then scoot it in the water. They would hit it best when I did that technique. I would also throw poppers on boats and then let them fall from the boat that would sit under boat docks. The best way I found to catch bigger bass was let it sit for five minutes without moving it and catch some of the biggest bass I’ve ever caught in my life. They would be underneath it and I guess they couldn’t take it and would eventually hit it. I read it in an article so I tried it and it worked like a charm. You got any pictures of the mouse your talking about. Here’s the ones I’ve been playing with. Two are caribou and the other two are the snowshoe rabbit.
-
Dano, are you wanting know the exact color of the thread? I'm not sure what you're asking.
-
February 16th 2008 Taneycomo I had a trip planned yesterday, but it got canceled because of the weather. However, I still fished and met a few guys from the forum. JD and Steve came down on Thursday so I knew they were down fishing. As soon as I pulled in the parking lot I saw Steve walking under the pavilion. It wasn’t raining yet so we sat under the pavilion and talked to several people before going fishing. I had a good time talking with all those people so if you’re reading this it’s nice meeting all of you. We decided to go fish down below gauntlet hole to start out for the day. The reason for this was it was the only place that was open up top. Everything else was crowded. When we got down there I could tell the water was up just a bit from normal pool. They weren’t generating, but there’s a rock that sticks up out of the water just a little bit and I noticed it was under about four inches. That made the water a little different from what it is normally in the sense that it slowed down the current just a little bit. Usually the current is going faster because it’s skinnier water. Every time the water widens out it will slow it down just a little bit more. It still made for good fishing as I saw a ton of trout rising on midges. I started out fishing what I had on the last time I went out with which was my famous egg pattern on a jig head (1/100) hook. I caught about five fish before breaking off. I was standing upstream and JD and Steve were fishing just below me about twenty feet down. JD started out fishing primrose and pearl and Steve was throwing the sculpin. I noticed JD picking up a few now and then and Steve really wasn’t doing so hot fishing sculpins. So when I broke off I started using a size 16 black zebra midge with a gold bead and copper wire for the rib and caught several fish right off the bat. The difference in today’s fishing was what depth you were fishing midges. Of course midges seem to be working better then anything else and that’s kind of odd considering we didn’t have any sunshine and the conditions were ugly for midges to be so active in the water column. I’ve always thought fishing midges deeper was the key when fishing midge patterns in the rain. JD was fishing his midge just under the surface and I was fishing mine deep. I was catching three or four to his one and I wanted to prove a theory on where trout would prefer a midge in these kind of conditions. So we all rigged up differently and fishing a midge close to the bottom was key. I did switch over to a copper bead and they seem to like the gold better. Maybe it has something to do with seeing the gold bead over the copper. The gold is a little brighter then the copper so maybe the copper blends in better in the water and fewer fish are seeing go by. Not only that, but the water was a little murky so gold probably did stand out better then the copper. We stayed down there for the majority of the time we were fishing because we caught so many fish. We did make our way down to the point walking with our drift and didn’t catch near as many as we did right where the water opens up form the gauntlet hole which is real shallow and narrow. It was definitely prime time in that one area and I did notice they were coming up to the surface more there then in calmer water as we got down to the big hole. We eventually got bored fishing that area and I’m on this kick fishing the opposite side up close to the cable. it’s been fishing really well and there’s hardly nobody ever fishing it so it makes for less pressure and those trout don’t see too many patterns go by so they are on the curious side. We caught a few fish on midges, but we weren’t there long enough to really figure out why because the rain came and it was a down poor. I knew when that time came it was time to call it a day. We did switch over to an egg and caught a few as we were walking out of the river. We then decided to go back and tie some flies at my house. I’ve been working on mouse patterns with snowshoe rabbit feet and carabou. And I must say they look great!! Should have those up in the next day or two along with a few other patterns I’ve been working on. So be looking for that.
-
Thom, This hook is the best thing since sliced bread. I tie all my midges on it if I’m tying small ones. I have a theory about it. Click here to read more about it and it should explain everything. Scroll down and look for the topic that says "anyone who fishes midges, this is for you". I plan on doing a lot more on this forum. I’ve been gone awhile because I’ve been trying to get my website full of content and know I feel like I can slow down a little bit and contribute more to the other forums. I enjoy this forum a lot and miss some of my old contacts. So be watching for more patterns to come. I still have about 60 how to steps to upload.
-
Greg, Matter of fact, I did yesterday, but nothing on the dry. In the summer time it's a different story. This fly works best when fished in faster water that has riffles. Usually if I'm going to fish this fly as a dry only, I don't really want to put a dropper on the bottom. If I'm searching for fish and not worried about the dry being the fly I want fish to hit, then I add zebra midge droppers or various type midges. Yesterday I had a trip in the morning, but we canceled due to the weather conditions. He lives up north and wanted to get back before the snow hit. So I went ahead and fished with a few guys from my forum. We started down below the gauntlet hole before you get to the big hole and we all started out fishing midges and caught several fish. JD was using primrose and pearl when we first started and Steve P was throwing a rusty midge. They were both fishing there midges shallow and I was fishing mine on the bottom. I was throwing a size 16 black zebra midge with a gold or copper bead with copper wire for the rib. Now days I like playing the trial and error thing where I want to see out of the three flies which one was going to be the golden ticket out of the three we were throwing. JD was having luck on the primrose and Steve was barely getting hits on the rusty midge and I was getting hits almost every cast. I think the difference was fishing deeper in the rain. I’ve done it in the past and remember from playing around through the years that trout prefer midges on the bottom when the sun isn’t out. And color had everything to do with it. The rusty midge doesn’t work as well until summertime gets here and primrose and pearl seem to be more of an attractor pattern because of the flash being the majority of the fly. The body is tied with pearl flashabou and if the sun was out I can see where this fly would get trouts attention. Anymore, I start believing that patterns are more about getting fishes attention and not so much relating to the pattern. I believe trout relate to what they see the most and we all know when the waters down that the majority of the activity would be midges. I saw a ton of fish coming to the surface even when it was raining. Even though the sun wasn’t out the midges were still emerging. Flies that don’t make since to us, either because they don’t imitate a specific insect that trout feed on in river systems, but do catch fish has to be more about the “trout” being curious enough to take a look at it or hit it. For instance, why do trout hit indicators? Back in the day before indicators became popular you would never see a trout rise and hit an indicator like a dry fly, but they do know. I think they think it becomes part of the food chain because they see so many orange indicators. That would be considered an attractor pattern because it doesn’t imitate anything, it’s just loud and gets their attention. Anyways, I’m just rambling on.
-
Rusty Midge Recipe Hook: Tiemco 2499SPBL size 18-12 Thread: Uni-thread (burnt orange) Body: Thread Rib: Black wire (BR) Bead Head: Tungsten 3/32 for 14, 5/64 for 16 (black) I have an article just for this fly and why it's important to look at midge fishing in a whole new way. Scroll down on my tips page until you see the topic "anyone who fishes midge patterns... this is for you". Tying Instructions: I really promote not tying thread bodies with waxed thread, but I had to make an exception because they don’t make this same color thread in any other brand. And this is a pattern that takes NO substitution or it will cost you fish I guarantee it. Step 1. Slide the bead on. Depending on the hook size will determine the size bead you will use. The two sizes I tie on more than any other sizes is 14 and 16 with 5/64 and 3/32 beads. So I really don’t waste my time with size 14 unless I am fishing high water. Start the thread right behind the bead and cut the tag off. Step 2. Cut a piece of wire and tie it in behind the bead. I like to push it up in the bead. Advance your thread back to the bend and make sure your wraps are even and you have a nice smooth thread body when you wind to the bend. Step 3. Once you get to the bend you are ready to advance the thread back up just behind the bead. Keep the wraps side by side. Step 4. Wrap the wire forward making segmentations as you wind the wire up. Try to make the spaces the same. The main key to this fly is to make sure the fish can see the segmentations. Step 5. Tie down the wire and move it real fast back and forth. It will break from it getting hot. If you cut it with scissors more than likely you will have a little tag showing. By doing it this way you won't. And you will never mess your scissors up from cutting wire. Note: Make sure you build up a cone shape behind the bead before tying it off. Step 6. Glue your thread wraps behind the bead and you got yourself a zebra midge.
-
Black Nose Dace Recipe Hook: Streamer 4xl (down eye) size 2-6 Thread: Uni- thread 6/0 Body: Flat Tensil (large) Wing: White, black and brown bucktail Eyes: Flat stick ons (yellow) or paint (laquer) Tying Instructions: Step 1. It doesn't matter where you start the thread. The only thing you need to do in this step is make a thread base in the back. You'll need to wrap in the same spot to build it up. Once you're done doing that advance the thread back up to the eye. Step 2. Advance the thread back up to the eye. Whip finish the red thread off and change over to black. Step 3. Tie your black thread in the front and cut the tag end off. You don't need to make alot of turns, just enough to get it started. Tie in the tinsel (gold side facing up) the whole length of the shank. I'm tying large flat tinsel that comes on a spool. One side is gold and the other side is silver. There's also a step you can do with this that is optional. If your wanting a rib also you'll need to tie in the oval as well as the tinsel and wrap back to the bend. Step 4. When winding the flat tinsel (first) you'll need to make sure they overlap each other just a little. This will prevent ridges or bumps in the body along the shank. The best way to do this step is with a rotary vise because you have more tension as your holding it. If you tied in the oval tinsel you need to wrap that up next and tie it down. When wrapping the oval tinsel up make sure you make big spaces in between. I would count five turns and you should be up at the eye. Cut the excess off and you're ready to tie the wing in. Pay attention to the stopping point which is where you built the thread dam with red. So leave a little bit of red showing in the back. Step 5. This step is very important and the reason why is so you don't build the head wrong or add to many thread wraps. You'll need to cut the hair at an angle (like a ramp) at the ends your tying in. This will keep the head building in a taper from large in the back to small up at the eye. Notice how far and how much I tied down. You want to make enough thread wraps to secure the hair. Step 6. Repeat the same step as you did tying in the white. You'll also cut this at and angle to before tying it in. And it will slightly be tied in front of the white like building stairs. Example: The black will be on the white and the brown will be on the black. But make sure you don't tie them directly on top of each other. Step 7. This is the last set of hair you tie in. Once you've tied in the last wing you'll need to clean up the head and maybe build a little bit more to have the proper amount of room to put the eyes on. If your not using stick-ons then you don't have to build up so much head, but I'm taking the easy route and using flat stick-ons in the smallest size. Once you've built your head whip finish the fly and your ready to epoxy the head. Step 8. Attach the eyes to the sides and your ready for the epoxy. Don't worry about gluing the thread because the epoxy will take care of that. Note: One thing you need to keep in mind is if the eyes don't match up with the diameter of the head you need to add more thread and build it up some more. The epoxy will not make a round ball if the eyes stick out pass the thread head. You'll find yourself adding more epoxy to fill up the mistake. Completed fly.
-
Disco Midge Recipe Hook: TMC 200R size 16-20 Thread: UTC 70 red (or color to match body) Abdomen: Red Accent Flash Head: Peacock herl strung (bright green) Tying Instructions: Step 1. Start the thread a little behind the eye. You only need a few turns of thread and cut the tag end off. Your ready to tie in the flashabou. Step 2. Tie the flash in and wind to the bend. You only need one strand to complete the fly. If you’re using a pearl color I would use two strands so you don’t see the underneath. Note: I like to make a smooth foundation with thread wraps so when I wind the flash up, you get that flat look instead of ridges. So make each turn side by side. I also like to use floss (utc 70) thread instead of wax(uni-thread). Step 3. Advance the thread back to where you started it when you first tied it in. Leave a little room so you can tie in the herl. Step 4. Wrap the flash up making each wrap lay a little over the last wrap keeping them side by side. Cut the excess of and your ready to tie in the herl. If you have a little tag still showing after you made the cut go ahead and tie that in with a few turns of thread. Step 5. Now tie the herl in. When picking herl you want to make sure you get fairly long ones because you're going to twist these. You can use one or two strands. Of course if you only use one then you don’t need to worry about twisting it. I like mine to be more durable so that’s why I use two. Your going to tie these in at the ends. Note: When selecting herl make sure you look at the stem to see if there’s a good amount of herl on it. That’s where you need to make your cut at the end. If you look at the end you can see there’s not much herl until you get up the stem a little ways. That’s the “Good” stuff. Step 6. You only need to wrap it in about three turns. Trim off the excess, whip finish the fly. Glue the eye and you got yourself a disco midge my friend.