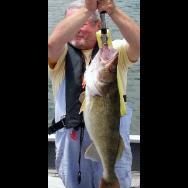
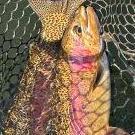
Not long ago, I posted about walleye night-crawler harnesses that I had made during a "snow day" holiday from teaching. Several questions were asked. I decided to write this article as a show and tell to encourage anglers who are unfamiliar with the method of fishing to take it up and make their own harnesses. Because I am accustomed to posting about recipes and cooking, I will format this article as if we were making chili.
Ingredients
high quality monofilament or fluorocarbon line, 10 or 12# test
1/2 to 5/8 inch barrel swivels
size 1 or 2 J bend offset worm hooks
bobber stops
size 1 or 2 super death hooks
1.5 inch Macks Smile blades
small swivels
float beads
size 3 or 4 Indiana, Colorado, Royal, or Willow blades in various metallic or bright colors
folded clevises or quick change clevises
Methods
Chuck's Standard Tablerock Harness
Using a Palomar knot, tie the tag end of the spooled line to the J bend worm hook. Snug it down and cut off the tag end, leaving about 1/8th inch above the knot to serve as a worm holder.
Hold the hook in one hand and the spool in the other and extend your arms to about 4 feet across. Cut the line at the spool.
Thread the new tag end through the bobber stop loop about 4 inches and slide the stop off the loop onto your line. The bobber stop serves to keep the float and blade from pushing down and bunching the worm nose.
Move the stop down to within 1 inch or so of the hook knot.
Thread the line through the 1.25 inch torpedo float bead of your color choice. (Alternatively use 4 or 5 spherical float beads or 2 or 3 elliptical float beads.)
Thread the line through one hard plastic bead. (Note: I use either fluorescent yellow or fluorescent red for all my harnesses.)
Put your blade on a folded metal clevis and thread the line through both loops. Be sure the cup of the blade faces the hook. If using a quick change clevis, be sure the C shape is toward the hook and the opening toward the front.
Thread the line through a second bead.
The first bead on serves to keep the clevis from binding on the float. The last bead on helps prevent moss and leaves from fouling the easy spin of the blade.
Holding the components snug against the bobber stop, measure three feet of line from the rigging. Using another Palomar knot, tie on a crane swivel at that point.
I store the harnesses wrapped around pool noodles by inserting a nail through the swivel loop and wrapping the harness until I can use the hook point to secure the rig.
The Smiling Slow Death
Attach your super death or slow death hook to a small swivel.
As with Chuck's rig, attach the swivel to the line with a Palomar knot and measure off four+ feet of line.
No bobber stop will be necessary, so thread the line through your chosen float beads.
Thread the line through one hard plastic bead.
Thread the line through a 1.25 or1.9 inch smile blade, back to front.
Do not put a bead in front of the smile blade. It restricts the spin of the blade.
Snug the rigging to the hook and measure 3 feet of line.
Attach the barrel swivel at that point with another Palomar knot.
Good luck!


Recommended Comments
There are no comments to display.
Create an account or sign in to comment
You need to be a member in order to leave a comment
Create an account
Sign up for a new account in our community. It's easy!
Register a new accountSign in
Already have an account? Sign in here.
Sign In Now