
Phil Lilley
-
Posts
19,027 -
Joined
-
Last visited
-
Days Won
132
Content Type
Profiles
Forums
Blogs
Events
Articles
Video Feed
Gallery
Everything posted by Phil Lilley
-
MDC fisheries would like to do the same thing but the bass groups on Table Rock have gotten very upset at the suggestion. From what I understand it's a very, very volatile subject.
-
Fall Creek is about 1.5 miles upstream from here (Lilleys). We are about 1/2 mile up from Cooper Creek Access, 4 miles up from downtown Branson.
-
Where is the PSO? Is it on this image?
-

I'm gonna go out on a limb here
Phil Lilley replied to bryantsmallie28's topic in Carp, the Other White Meat
What can we say Bryantsmallie28... it's winter and we're desparate for entertainment. -
Looks like you have plenty of water there. Must be nice. If I'm jealous of anything it's your water. Thanks for the report.
-
I know this is a wide pic but you'll just have to scroll sideways. Zink Dam is on the far left- right? I know highway 44 - it looks like you fish up or north of 44. Are there any boat ramps? It looks like park space along the river on the downtown side- I assume you park someplace there and walk down to the river. Looks like there's a shoot at the bridge- the stripers should gang up here or just below it I'd think. Sorry- looking at these google earth pics gets me wondering....
-
Is it fesible to put a boat on the river and fish these areas? I'm thinking about making the trip during the week and I understand the water may be too swift to wade? Is that right? If so, one of my jons with a 25 hp motor should be alright to boat up and anchor in an eddie. I'm still feeling out the river- from the stories and pics. I have an old HLS 7 wt that will handle any striper in that river... it's handled chinooks up to 35 pounds on the Pere Marquette. Can't wait.
-
Friend went to the Spring Friday - upstream from "slim's" docks about 3-4 miles above the Twin Bridges, down from Moccasin Bend. On the bottom in 13-15 feet of water using chartruese swimming minnow, 4 lb test. It was very windy so conditions were tough. Caught 20 nice whites.
-
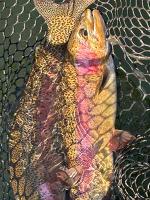
Red part is fat- has a strong taste. Also be careful not to get any of the oil off the skin on the meat- also fishy tasting. It a firm meat- some don't like it but if it's prepared yummy- it will be yummy. I just like catching them!!!
-
Sounds like midges... Rich- we need to go to the Arkansas!!
-
The Babler's have the answer for your Valentines gift this year - a night at their B&B Lodge overlooking Table Rock Lake. Marsh and I, joined with my parents, and treated ourselves to smoked prime rib dinner last evening out at the lodge, served by Becky and Bill to perfection!! They had a couple of last minute cancelations so we took advantage to a wonderful evening around the fireplace. Even if you're local.... especailly if you're local.... go out and spend the night, taking advantage of their hot tub, beautiful view, wonderful great den with fireplace and gorgeous rooms. http://whiteriverlodgebb.com --Phil
-
and if you happen to meet Brian on the river, you'll learn a ton more. He's the most helpful angler I know, willing to share flies, tippet, even his spot.
-
I'm gonna go out on a limb here
Phil Lilley replied to bryantsmallie28's topic in Carp, the Other White Meat
As much as I love crappie, freshy fried and hot sucker filets taste pretty good. I've grabbed once- along time ago in Roark Creek. Didn't do well- caught alot of rocks. Takes all kinds of people to enjoy all types of fish we've been blessed with... you know! I like'm all. -
Well... You can post a link to a pic somewhere on another server at any size but remember those who have 56k connections and small screens. 800 pixels wide is about the biggest you should post. But as far as limits on the forum, there's none but if you try to post a 2000 or 3000 pixel wide pic, it won't take it fully. If you have a pic you want to post and are having trouble, email it to me and I'll help phil at lilleyslanding.com
-
They've done real well on chrome spinners and spoons in the upper lake this weekend... should try that downlake. If you're looking at the dam from upstream, there's a ledge on the left side (Forsyth side) that usually holds trout. Can drop pwer bait to them or vertical fish jigs there.
-
I think they have an owners association.
-
I'm gonna go out on a limb here
Phil Lilley replied to bryantsmallie28's topic in Carp, the Other White Meat
Gosh... didn't mean to start a minor skirmish... just kidding---no I'm not---never-you-mind. -
Download a new version of windows media - http://microsoft.com and search windows media. Restart your computer and see if that helps.
-
-
-
I'm having rack cards designed and printed for the trout parks. I'm covering Bennett. I need the other parks covered. I need a couple-few-volunteers to take the cards and give them to the local bait shop as well as putting them on cars(?) and leaving them around in spots where anglers will pick them up. These are OzarkAnglers.Com cards. I'm hoping to bring the crowds to the forum. I should have them by the end of next week. They will go out in the mail on Friday or Saturday, Feb 17 or 18. Any takers? Same message will posted on the other park forums.
-
I guess you didn't catch any fish...
-
You can print the full map on 8.5 x 14 legal paper. The others may be too big for 8.5 x 11. I'm going to buy adobe acrobat soon and put them in a pdf format- then they will be easier to print.
