
Phil Lilley
-
Posts
19,027 -
Joined
-
Last visited
-
Days Won
132
Content Type
Profiles
Forums
Blogs
Events
Articles
Video Feed
Gallery
Everything posted by Phil Lilley
-
Talk to Tim Sainto just now... he said he limited x2 yesterday morning in the Yocuum Creek area but had to work for them. Got sleeted on- but said he was still catching crappie in 4 foot of water on the flats. The bigger crappie are going to be down in the lake closer to the Missouri line on the bluffs in the trees. Going to have to go deeper too- 10-14 feet deep.
-
Interesting you mention that - our stats show the following: Explorer - 90.8% Firefox - 4.8% Netscape - 1.9% I use netscape. Other - Windows - 96.9% MacIntosh - 1.7%
-
Exactly - it's frustrating to see so much $$$ going to east and west coast projects that few of us will ever see. TU regional did give us some money when we built the collection bend at the hatchery parking lot. I talked to Phil Surratt today about some of the things we've talked about. OzarkFlyFishers sound like the club/structure we may look into. Form a club then encourage members to join either FFF or TU. Sounds like FFF is open to something like that... TU may not like the idea because they wouldn't get funding thru membership. But if another club like NW Arkansas does it, we'll see. Gavin- thanks for the offer. We may be calling.
-
-
One false move could cost you your head....
-
What do you do with this many fish? Can them? Pickle them? Big fish fry? I've heard they're not good after being frozen.
-
I ran out of "fatty" names after 30. Curtis keeps them fed real well. They're starting to eat floating food- cool topwater action. The rain and boat traffic has clouded the water today. They may run water tonight and clear it up.
-
We just lowered the rate on the streaming so more people should be able to view it. That may have been your problem. We're going to watch it and see. It's still trial and error. You still may try going into Windows media direct - file/open url and type in http://66.76.215.83:1200 and see if that works.
-
TU requires chapters to hold a fundraiser annually. They also only pay the local chapters a small percentage of the membership dues paid. That's the only requirements by national. Don't know anything about FFF. But like I said, we could combine 2 organizations- one group of guys. Double the opportunities. TU has nothing like the conclave or sow bug which are great opportunities for members. There an organization close by that's both- isn't it NWArkansas FFF/TU?
-
I'm not pushing TU here- want you to know that. But the reason we started a TU chapter here and not a FFF chapter is because there are higher-ups in MDC that are TU and have helped us with issues here on Taney in the past. BUT, saying that, it doesn't bode well that the chapter has gone nill and not much has been done to help it. I have heard of groups affiliatied with both organizations. I do believe there can be alot accomplished in education from a group like this. And it can be an influence on some issues on Taney but for the most past, MDC does what they want to do regardless what the public says. The limit change is an example. I'm open to whatever.
-
Another year another Master's winner... Eric and Troy Willis, father/son team from here in Branson trolled their way to victory today, cashing in on the $440 first prize and coveted Master's Traveling Trophy. It was only their second year to fish the event. Troy caught the big brown of the day netting another $110. They trolled below Cooper Creek all day using a variety of Lucky Craft baits. Jerry and JD Dudley, another father/son duo from Fayetteville, Ar, took second, throwing jigs in the Short Creek area. John Hittler and Frank Dielt (bass guy) caught third place fishing downstream and throwing jigs. Youths Hathman and Banover from here in the area took 4th place. They were throwing small crank bait for most of the day. Standing- Willis/Willis - 7.92 big brown 2.84 (20.1 inches) Dudley/Dudley - 7.64 w/ big rainbow 1.44 Hittler/Dielt - 6.68 .98 Hathman/Banover 6.40 1.16 Stockton/Stockton 6.20 .98 Hawkins/Hawkins 6.12 .94 Dishman/Plotner 6.08 1.36 Dwiggins/Wucher 6.06 1.24 Burckhardt/Dwiggins 5.88 1.10 Dishman/Dishman 5.88 .94 Elfrink/Pingleton 5.70 Weldele/Frenzel 5.64 Rasnick/Pitts 5.48 Slagle/Miller 5.32 Biermann/Gust 5.20 Martin/Griesse 5.12 22 teams
-
Fly or spin? Boat or wade? Temp is about 50.
-
Grey jig.
-

2/4/06 - O/A Lake Taneycomo River Clean Up
Phil Lilley replied to Brian K. Shaffer's topic in Upper Lake Taneycomo
You can start out of our place but don't start will after 8 am. I have the RAW tournament that day and that's when they take off. -
Takeoff was at 8 am. Weigh in is at 4 pm. 23 teams with only 3 fishing "up".
-
A few of us started the TU chapter 12-14 years ago. The same guys have lead it for most of those years and got burned out. No one has picked it back up... yet. TU Missouri is talking about merging all the chapters into one- KC, Mid-Mo and Meramec, the Meramec hasn't been active for quite some time. Not sure what that will do- for Branson anyhow. I'd like to start meetings back up but just not right now. I'm part of a very small group that's trying to build a 6.6m YMCA facility right now and my time is taxed too much. But there may be others................
-
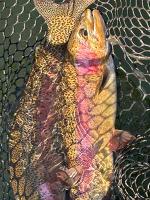
6 lb caught today (released) down below Rockaway Beach. Frank Dielt of St Louis
-
Good fishing today and what a day to be fishing. Bait guys did well from the looks of the cleaning shack at 5:30 pm... and jig fishing was good too, reported by the pre-tourney guys fishing today. Frank Dietl from St Louis caught this 6 lb largemouth bass below Rockaway Beach on a black/gray jig- yes they were trout fishing. They caught quite a few bass in the pound to 2-pound range. Getting some rain... it needs to rain for days to catch up but this is nice. Hope it doesn't rain enough to muddy the water for tomorrow tournament- but if it does- so be it.
-
I wasn't for the increase in fees or the reduction of the limit... but as far as Taney, I'm giving them more time to get numbers and sizes in line with their promises.
-
I could be mistaken on the numbers... it could be 10,000 total. I've heard as many as 15,000 have been stocked but I think MDC has broaded their scope for stocking browns across the state. But there's never been more browns stocked, at least in recent years. You have to remember stocking ratios vs how much a body of water can take. Stocking too many browns, which can't be harvested till they're 20 inches, can deplete the food base, just like MDC did back in the 80's by stocking too many rainbows.
-
4000 brown trout were stocked this month by Shepherd. They averaged about 11 inches. The remainder of the annual stocking will take place in April or May and will add about 2000-6000 more brown trout to Taneycomo.
-
Just talked to James at the hatchery. He said they haven't clipped any rainbow fins in the past 10-15 years. Rainbows that are missing fins lose them in the concrete raceways at the hatchery. Brown fin were clipped several years ago but are not being clipped presently.
-
Calling Mr. Shaeffer... Mr. Brian Shaeffer...
Phil Lilley replied to Forsythian's topic in Upper Lake Taneycomo
miracles do happen... What do you do during the daylite hours??? You need to come by. -
Can someone share exactly where Capps is? Also, what kind of access is there and directions to them. Thanks
-
I just bought 14 mink pelts off ebay and have started to mix mink with antron. Rolan Duffield shared a mixture with me he uses when tying scuds that's one of the deadliest flies on the lake next to "peppy".
