Jump to content
Featured
duckydoty
duckydoty

Painting jerkbaits for big trout

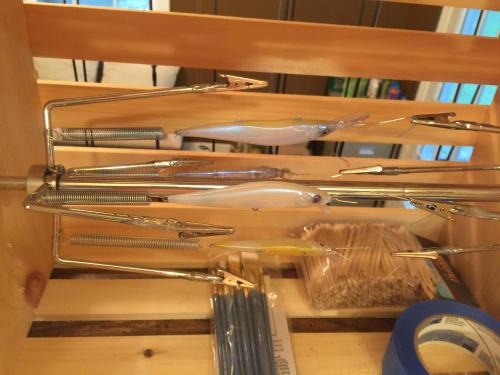
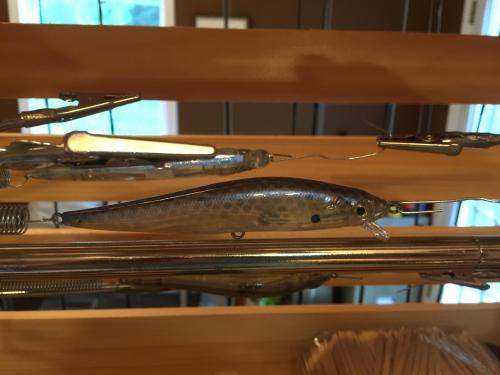
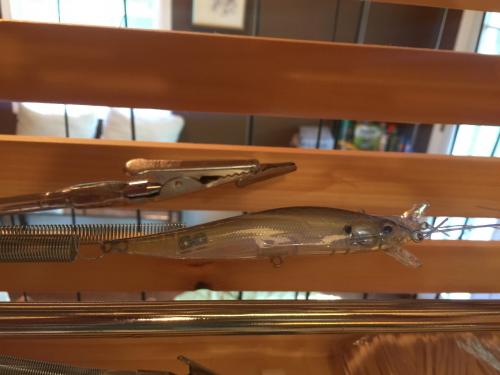
I have started to paint jerkbaits for big browns.  Now, I am completely new to this and just diving right in head first.  I purchased a fairly cheap complete airbrush kit from Hobby Lobby, water based acrylic paints, powdered mica pearl pigments, and 2 part epoxy clear coat as recommended by our very own Mr. Billethead.  Thanks Marty!  Been gathering various jerkbait blanks from different suppliers looking for ones I can get to suspend.  I’ve been trying my hand at two different color schemes and feel like I’m starting to get them dialed in.  My ultimate goal is to get a rainbow trout and brown trout pattern dial in but I’m a long ways off from that yet. It has been an enjoyable way to spend what little spare time I have this time of year sucking up some AC and staying out of the heat.

16BDF104-0F06-43E4-B5A3-800A3C26F117.jpeg

BBE3E447-8832-4254-BA7B-B66CE2D4CEC6.jpeg

FBD50010-F192-42BA-BA3D-8D7284D92599.jpeg

8AC9A39E-2DB4-41C0-B58C-9080BB575146.jpeg


User Feedback

Recommended Comments


  • Members
On 7/30/2018 at 8:25 AM, duckydoty said:

Still learning a few lessons.  Stippling dots worked great!  Apply parr marks first then paint rest of body to tone down marks.  Thin gill plate rose highlights very thin and apply sparingly.  Just got some KBS Diamond Coat as a top coat and I’m anxiously awaiting trials on that for top coat but did not want to chance it on these.  Just now getting comfortable with BSI slow cure epoxy.

here is a still just Incase video did not work on previous post.

F48D9197-D15A-472D-A8FA-8D953A981CC4.jpeg

Your colors/pattern look very close to these Livetarget trout fry lures


image.png

Link to comment
Share on other sites

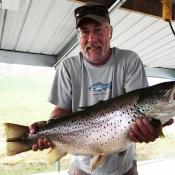
Finally got to fish the rainbow pattern this morning on the Upper Lake with the water off. First fish was a 20 inch brown.  We caught a few bows, another 17 inch brown and a couple walleye, along with a good sized channel cat and a few of them stinking brown bass on it.  Could not be more pleased with the results!

997E710B-7414-471D-8FD1-472BE3406FED.jpeg

3B66DC87-40DF-4BCE-970E-105021F36FE5.jpeg

49D511AB-00E5-4A64-8A43-6211182B969E.jpeg

8CF0DC19-C0F3-411D-936F-72B84FEF895D.jpeg

5DF97296-CCE4-439C-8A41-FF2A638D4956.jpeg

3765A5C4-3306-429F-A25D-F0C9FAA0D820.jpeg

660D88F0-9E71-44C5-B7D8-0B6D2D0CCB62.jpeg

B75C7F0D-5174-4199-8348-4DBE5F93A29E.jpeg

F49E1347-A890-4C2B-8D16-280216B1139A.jpeg


This post has been promoted to an article
Link to comment
Share on other sites

Just another quick update/tip on the learning to paint baits journey.  After going through 2 sets of BSI 30 minute epoxy, I finally got it down pretty good with mixing 3 second pours from the  heated bottles and thinning with denatured alcohol as needed. Still had a few blemishes in the finish. I purchased some KBS top coat a while back but was hesitant in using it for fear of not quite as good of a finish that I was getting from the epoxy and the care that has to be taken in resealing the KBS due to contact with moisture in the air will start to set the cure.

Found an old fashion wide mouth Mason jar and some silicone insert sealing rings to store the KBS in. I also got a can paint saver air displacement stuff to spray under the lid of the Mason jar after use to keep it from starting to set. The KBS was $58 per quart so I would like it  to last as long as possible.  

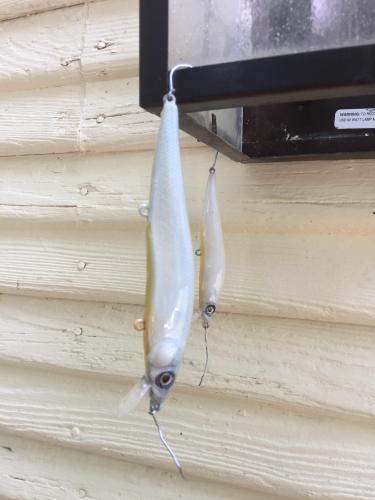
I now just hang the baits on a paper clip and put a drip wire in the bottom eye, dip, hang, and done!  The finish is fantastic!

D4842F11-8935-4991-9A6E-578931CBB4D9.jpeg

Link to comment
Share on other sites


Create an account or sign in to comment

You need to be a member in order to leave a comment

Create an account

Sign up for a new account in our community. It's easy!

Register a new account

Sign in

Already have an account? Sign in here.

Sign In Now

×
×
  • Create New...

Important Information

By using this site, you agree to our Terms of Use.